Followers

Sunday, 18 March 2012

So little time...

Firstly, I must apologise for not posting on my blog last weekend and therefore failing my New Year's Resolution to post weekly in only the third month!  Anyway one reason for this is that sadly apart from the Papermaze Crop yesterday, I still haven't had any spare time to craft, but I guess some weeks are just like that! 
There are so many crafty projects going round in my head at the moment and my list of projects include:
  • April Bramford crop girls challenge - an altered children's book set by Janina (Tractor Girl Gone Scrappin);
  • An altered frame (keep calm and carry on theme) for Nancy (Kitty Scrapper);
  • Tim Holtz 12 tags: both February and March;
  • Scrap365 layout challenges;
  • Mounting and using my new Bombshell Stamps Sugar Skulls stamp set; and
  • A mask for my works Masquerade Ball in June.
As you can see my list is quite long and I am adding to it all the time.  Some of these items are due in a couple of weeks and require quite a bit of effort to complete.  In my opinion, work does get in the way of crafting!

In the meantime I have another fabulous project from a workshop taught by Carol (Krafty Pieces) at Papermaze, probably a year or so ago now.  This time we altered a Tando Creative frame and base.  This was a great technique class and as always I thoroughly enjoyed the workshop and absolutely love the finished frame.

Thanks for looking!
Tracey x

Sunday, 4 March 2012

Carol's Workshop - Configuration Box

As much as I love the chance to get into my craft room as often as possible, I just haven't managed to this week so instead I would like to share something I made at a workshop last year. 

I was very unfortunate to miss out on a place at the PaperArtsy workshop with Tim Holtz in February 2011 but one of the Bramford girls, Carol (http://kraftypieces.blogspot.com) went and then taught a workshop at my local shop, Papermaze (http://www.papermaze.co.uk) in May.  I am very pleased that Carol has just joined their DT. 

During the workshop we altered a Tim Holtz configuration box using papers, tissue tape and an old dress pattern.  As the theme was sewing and we used a number of related items to fill each of the boxes.  It really was a very enjoyable day and I love how much there is to look at in the completed box which now sits in my living room for all to see and admire.
 
Thanks for looking!
Tracey x

Sunday, 26 February 2012

March Crop Challenge - Wooden frame

I have spent a very enjoyable morning in my craft room as next week is the March Bramford Crop.  This month's challenge was set by Karen (http://daisymaycreates.blogspot.com/) and we were each given a 6x6 inch wooden frame to alter.  To start with I wondered what to do and looked at several different techniques described in the Craft Stamper magazine.  All I knew was that I wanted to use my newly purchased Artistic Outpost London Underground stamp set.

I started off by painting the edges of the frame with the Ranger Snow Cap Acrylic Paint Dauber.  Next a cut a piece of white card stock just smaller that the frame itself, rounded the corners and cut the centre out plus one small strip for my sentiment.  I stamped the white card with each of the stamps in the set except for the 'Keep calm and carry on' which I stamped in the middle of the card I cut out of the centre.  I used Tim Holtz Barn Door and Faded Jeans Distress Inks on both pieces but left some of the white card showing through.  Next I spritzed some Tattered Angels Glimmer Mist in Marshmallow, Sapphire and Black Cherry.  Once happy with my outside piece I distresses the edges of the card stock and covered the entire piece with Ranger Distress Crackle Paint Rock Candy.  Next I cut a piece of corrugated cardboard and stuck this to the frame using Claudine Hellmuth Studio Multi-Medium.  I also painted the Multi-Medium over the top of the Rock Candy and rubbed a small amount of Ranger Perfect Pearls - Perfect Copper in the top corner.  To finish my centre piece I wound some Stampin'Up Linen Thread round the bottom of my 'Keep calm and carry on' sentiment and placed this square behind the glass.  I attached a crown charm to some twine and glued this to the cardboard so that it hangs above the sentiment but on top of the glass.  Finally I glued the main stamped frame to the corrugated cardboard and I used foam tape to give some depth to my 'London calling...' sentiment.

Normally I wouldn't post my finished challenge piece until the day after the crop but most of the other girls have posted early so here is my finished frame: 
Thanks for looking!
Tracey x

Sunday, 19 February 2012

An introduction to Altered Art - Secret Santa 2010

I'm going back in time for today's post but wanted to share with you what I believe was my introduction to Altered Art.  It was a natural progression in my crafty journey which started with cards during a period living in the USA back in 2000/2001, then after very many years (almost a decade) I finally made a move to try Scrapbooking and very quickly from there on to ATC's, Tag's and Altered Art.  Really the later came about after joining the Bramford crop and becoming involved in the girls monthly challenges.

So 2010 saw my first Secret Santa with the Bramford crop girls and it was all about altering boxes.  As I said this was my first real experience of Altered Art.  We picked names out of the hat and I was making mine for Nancy (http://kittyscrapper-nancy.blogspot.com).  The girls told me where I could find plain wooden boxes and the shape I chose came as a set of 2, one larger box with a smaller one inside.  I knew that this would take some time to complete but had the opportunity to undertake the challenge whilst at my annual Belstead House weekend in the November.

I decided to alter the smaller of the 2 boxes as it seemed such a large project for me to complete anyway.  At this point my Altered Art stash was limited with no paints so my first challenge was how to cover the box...in the end I used a brown paper bag, I usually get these bags when purchasing my crafting goodies from the Papermaze (http://www.papermaze.co.uk) shop and they just cry out to be altered in my opinion.  As you can see I used loads of Tim Holtz products on this project such as masks, distress inks, dies, fragments, stamps, grungeboard, sepia accents, glossy accents, rock candy, memo pins, brad, ticket etc.  Obviously my addiction to all things Tim Holtz was well established by this point!!  I also used a Stampin'Up stamp for the sentiment in the middle of the tattered floral and ribbon to go round the lid plus a few clear accent beads and glimmer some mist.  Once completed I was so pleased with it that I went on to do the same for the second box so that I could keep one myself.  The photo's below are of the box that I kept and it still sits proudly on the dresser in my living room.

Needless to say I was immediately hooked on altered art and nowadays I spend most of my time wondering and dreaming what the next project is...I just need the time to bring my ideas to to life but work tends to get in the way most of the time.
Thanks for looking!
Tracey x

Sunday, 12 February 2012

Altered Wooden Block

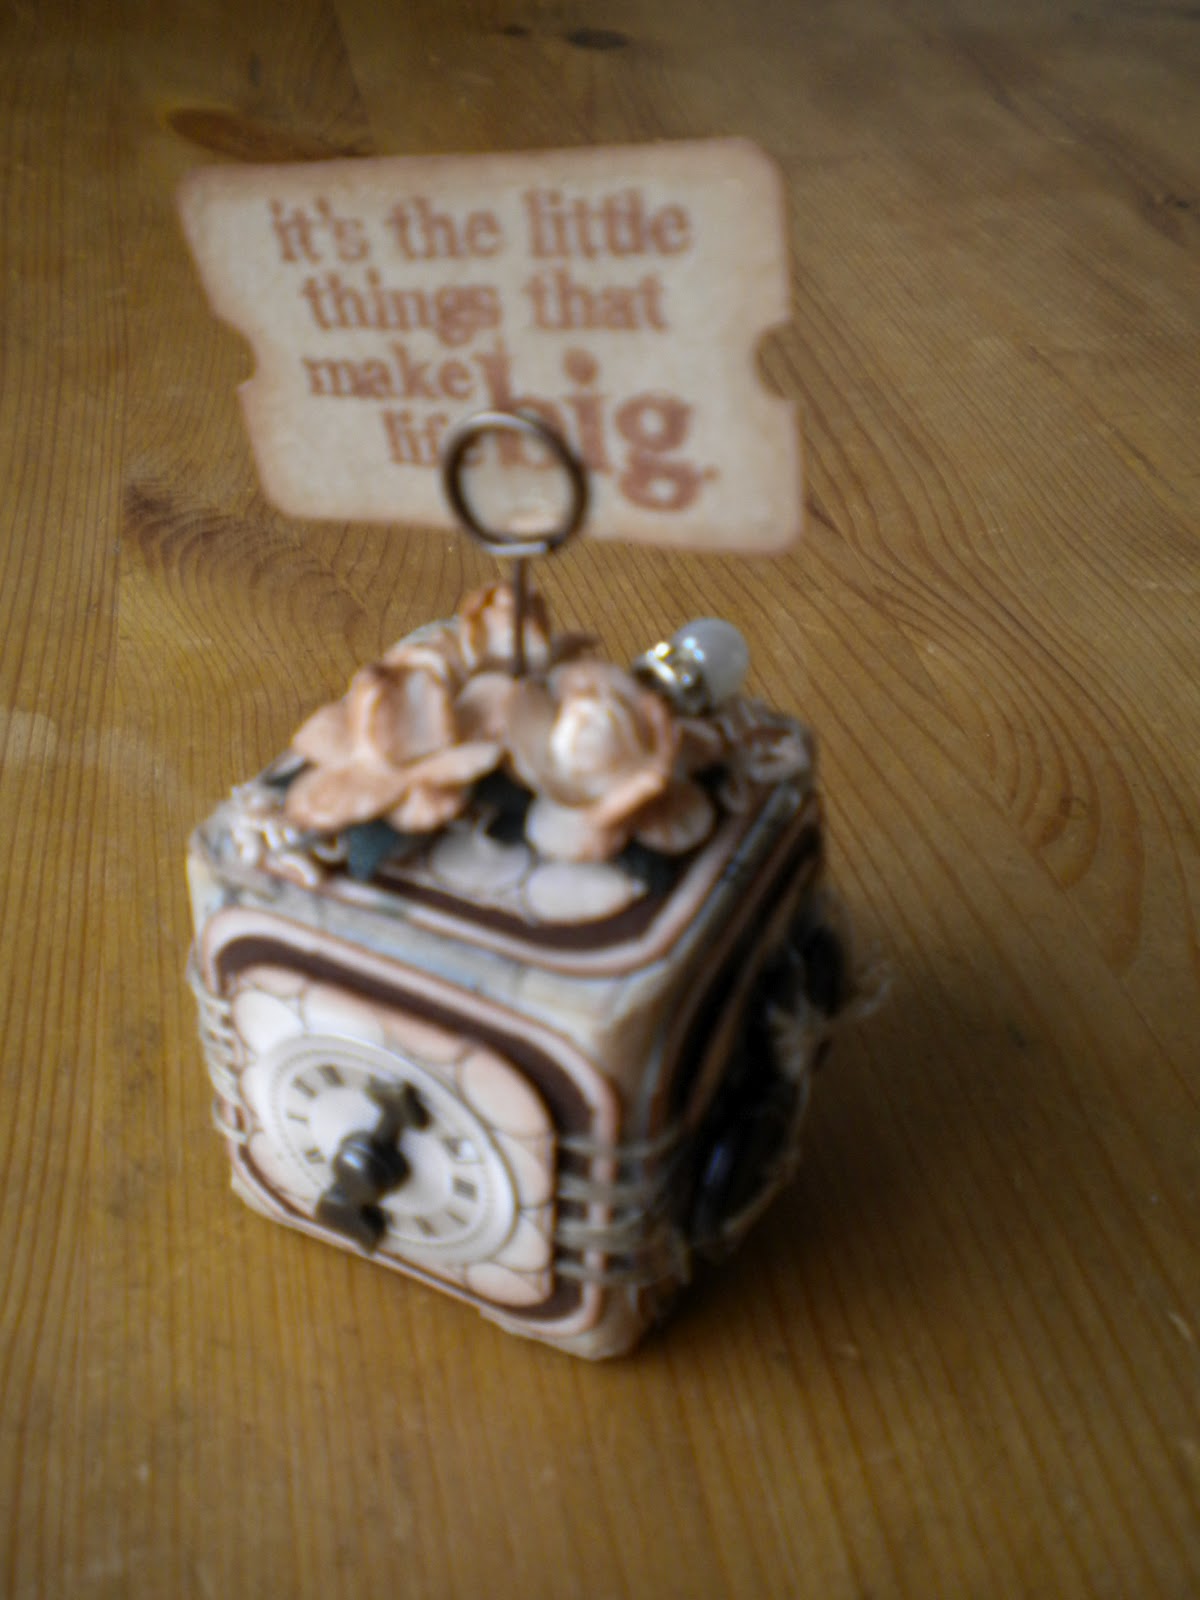
So February was Carol's (http://kraftypieces.blogspot.com/) turn to set the Bramford Crop girls challenge and she presented us each with a small wooden block.  Each side measured 1.5 inches and mine was blue and a bit battered.

I spent quite a while trying to decide what to do with it and my first idea was to cover it in paint and to go from there.  In the end I decided against painting and instead for the base I first covered all of the edges with Tim Holtz Tissue Tape. Next I cut 6 squares from White card stock, 6 smaller squares from Brown Bazzill Card Stock and finally 6 even smaller squares from the Basic Grey Basics range.  I  rounded the corners and inked the edges.  I glued the first 2 layers but before adding the final layer I ran some Stampin'Up Twine around the block. 

The for the top I asked my boyfriend to help me push a Tim Holtz Memo Pin into the block.  I stamped a Tim Holtz saying onto a ticket puched out of Kraft card stock, inked the edges and placed it in the memo pin.  For thetop of the block I added a piece of lace and covered it with 3 white flowers which I inked tomake them brown and finally I added a dress pin and some glimmer mist for a little bit of sparkle.

For the front I added a clock face and a Tim Holtz game spinner.

For this side I stapled Tim Holtz film strip ribbon using the tiny attacher and on top added 3 buttons through which I had threadedand knotted some twine.

For the back I cut out a flower in Stampin'Up papers using a set of Cuttlebug dies.  I inked the edges and used a Stampin'Up flower brad to hold it together

For the final side I punched a Brown base using the Stampin'Up Scallop punch.  Next I stamped a small Tim Holtz cinema ticket on Kraft card stock, added a Tim Holtz Mini paperclip and covered it with sepia accents.  I also added a gem.

Unfortunately I wasn't there for the Crop last Saturday and handed over my block a few weeks ago.   I took the photos prior to handing it over but didn't download the pictures until later and sadly these are not the best photos I've ever taken so apologies that they are a little blurry.

At the moment. I'm not sure who received my block but I hope they enjoy looking at it as much as I enjoyed creating it.  I really loved this challenge and was really pleased with the finished piece.

Thanks for looking!
Tracey x

Sunday, 5 February 2012

January Crop Challenge

So I've finally almost caught up with my pending blog posts and today is the turn of last month's challenge.  It was my turn to choose the alterable item for the January Bramford Crop girls challenge and I decided on a Door Hanger... 

We put names in the hat before creating the piece this month and my chosen paper said Nancy (Kitty Scrapper).  Although I've made a few door hangers over the past couple of months, I wanted this one to be different.  Now Nancy likes pink and so my theme was born.

Firstly I used the Snow Cap Ranger paint dabber for the edges of the wooden hanger and then covered the front and back with Basic Grey Basics paper and distressed the edges with Tim Holtz ink.  I stamped a flourish in the top corner and covered the image with Ranger Sepia Accents to give it a raised glossy effect.  I used the Martha Stewart Lace border punch to make a strip to go near the bottom of my hanger.  Next I cut two shapes using the Stampin'Up top note die, one with pink Bazzill card stock and one with the Basic paper and then I put the paper one through the Big Shot with the Stampin'Up Manhattan Flower embossing folder and once done, I cut the image just to include the flower and run a distress ink pad over the raised area to make the definition of the image stand out.  I stamped a Tim Holtz phrase on a punched ticket and layered this on a Tim Holtz journaling ticket using a Tim Holtz pin.  Finally I added some bakers twine wrapping it round two brads, added ribbon, tiny staples, dress pins, inked flowers and gems plus some small alphabet stickers to spell 'Nancy'.
Thanks for looking!
Tracey x

Sunday, 29 January 2012

2012 Calendars

One of my crafty friend's, Emma (Emma's Craft Shed) is a Stampin'Up demonstrator and just before Christmas taught a few of us how to make a lovely little easel calendar using Stampin'Up papers, punches and the brilliant Top Note Die. The one in the middle is the original and I liked the idea so much that I decided to make a couple of my own to give to my Sister and my best friend as an additional little Christmas gift.
Thanks for Looking!
Tracey

Sunday, 22 January 2012

Handmade Christmas - Door Hangers

Well I'm still trying to catch up on my blog posts and today I would like to share a couple of Christmas presents that I made as additional gifts.  Earlier in the year I made a door hanger for my craft room after which my eldest Niece asked where hers was, and so the idea was born.

The first door hanger was for my youngest Niece who is 6.  This one was easy as she just loves 'Hello Kitty'.  I wasn't organised enough to find scrapbooking paper so instead I used a sheet of wrapping paper and a gift tag.  I added some Bazzill cardstock, Ribbon, Gems, Rock Candy, Stickles, Glossy Accents.  Next I cut a Cuttlebug Flower die and added a Stampin'Up flower fastener in the middle. The letters were cut using the Tim Holtz Vintage Market die.
Secondly I created one for my Nephew who turned 14 at New Year.  I didn't want anything fussy or the usual teenage boy toxic look, so instead I used the Bo Bunny Blast Off paper along with Bazzill cardstock. I also used Tim Holtz Distress inks, stamps, Glossy Accents, Rock Candy.  The letters were just some left over in my stash.
The third one was for my eldest Niece who turned 17 just before Christmas.  I wanted something girlie and although I used lots of my favourite Tim Holtz products, I decided to go for a pink and brown theme.  I used PaperArtsy stamps for the background, Tim Holtz Distress inks, a Tim Holtz stamp for the sentiment.  The die cuts are Tim Holtz Tattered Florals, Tattered Leaves and Butterfly.  The heart border punch is Martha Stewart.  I also used a Tim Holtz Journaling tag, Tissue Tape, small Paperclip, Safety Pin and Filmstrip plus some Gems, Ribbons, pins and a button.
Lastly, I made one for my best friend.  Basically I used the same design and materials as for the door hanger created for my eldest Niece but I tried to change it a little with the sentiment etc.
Thanks for looking.
Tracey x

Sunday, 15 January 2012

Secret Santa 2011

This was my second year participating in the Bramford Crop Secret Santa, and if you read my blog on a regular basis, you will know that there are 6 of us who join in the monthly challenges which are always fun.  Last year we each decorated a box but this year wasn't specific so I decided to try something different and found a small canvas and easel in my stash to alter.

I used Tim Holtz Distress inks and a couple of different stamps on the background, then cut up a stamped image so that I was left with just the girl and the word 'Wish', these images were coloured with ProMarkers, glitter pens, distress ink, gems and glossy accents.  I added a strip of ribbon along the bottom, Tim Holtz Tissue Tape around the sides and 3 little balls for depth.  Finally the little girl was added .  I hope it looks nice sitting in the recipients craft room.
Thanks for looking!
Tracey x

Wednesday, 4 January 2012

Christmas Tree Decorations

The December Bramford Crop was set by Janina (Tractor Girl Gone Srcrappin) and consisted of 3 Christmas Wooden shapes - a House, a Star and a Tree.  I used scraps of Christmas papers to cover each of the shapes and then added additional accents such as Angelina Fibres, Tim Holtz Tissue Tape, Glossy Accents, Rock Candy, inks, a lace punch and a Stampin'Up sentiment for the centre of the Star.  I really enjoyed creating these three and as we draw names to swap the challenge items, I hope they looked nice hanging on the recipient's Christmas tree! 
Thanks for Looking!
Tracey x