Followers

Sunday, 30 November 2014

Advent Calendar

So after my inky crafty weekend last week I am well and truly hooked again. So much so that during the week I made an order with Papermaze so that I could finally make the Kaisercraft advent calendar (which I purchased about 3 years ago)! Needless to say I've enjoyed some of my weekend working on this project. 

I found a great tutorial on the Merly Impressions blog when I first bought the calendar, I found it again and read it through for any hints and tips that I needed to know. I used Adirondack espresso and gold acrylic paint dabbers, brushed corduroy distress ink, gathered twigs distress stain, My Minds Eye Joyful papers and embellishments, plus twine, gems, pins, tissue paper and glossy accents.

Unfortunately I've finished the project after dark so the photos aren't as good as they could be.


I am so pleased with how it's turned out and I know we're going to enjoy using it for years to come. Now to fill it with a mixture of Lindor balls ready for the morning.

Thanks for looking!
Tracey x

Tuesday, 25 November 2014

Baby Shower card

On November 1st we held a baby shower for my Niece. As often is the case I was a bit last minute and have to admit I didn't really know where to start for this type of card and my original thought was to go with something along the lines of a rain 'shower'. Thankfully on the morning of the shower I remembered that I had these Jolee's pregnancy dimensional stickers in my stash...perfect. I combined them with inks, gems, stamps, punches, flowers etc. and came up with this simple and individual card.
Thanks for looking!
Tracey x

Monday, 24 November 2014

I'm back!

Yes that's right, I'm back...

Except for the occasional card here and there I haven't done any serious crafting since September 2013! I know...over a year...I can't believe it either but I'm happy to say that all changed this weekend as I spent a really enjoyable time at a crafty retreat with friends.

Before I could pack up the car and leave home on Friday I had to venture into and tidy up my craft room in order to find everything I wanted to take. Now that was a challenge in itself (as some of my friends will know as my boyfriend once posted a photo of my messy room on Facebook)! It was like Aladdin's cave and I found a whole box of Tim Holtz items I'd purchased and not even opened!

So onto one of the projects I completed during the retreat. A while back my Niece asked me if I could make her a name banner for the little girl she was expecting last Thursday. I'm pleased to announce that Maisie was born on Friday so it was full steam ahead to get this project completed. I didn't really want to do anything too cute and wanted it to reflect my crafting style. I started with a piece of plain mount board and obviously used lots of Tim Holtz products, got very inky and enjoyed every part of getting back into crafting.


I'm thrilled with the finished piece and visited my great Niece to meet her this morning, she is absolutely beautiful. Her Mum and Dad were also very pleased with the gift I'd made for them.

It's great to be back so watch this space for the posts showing the other 2 projects I've enjoyed working on over the weekend.

Thanks for looking!
Tracey x

Sunday, 22 September 2013

A very special Wedding card

I really enjoyed making each and every one of the items for my Sister's Wedding and last but not least was the actual Wedding card from myself which I didn't get the chance to make until a couple of days before the big day.  I wanted the card to reflect my crafting style in order to make it more personal and used the same tattered rose distress ink and embossing folder as for the Wedding invites I created.  I wanted something different to the norm and had purchased the Tim Holtz pocket watch die a few months back but hadn't used it before, I decided to make it the focal point of the card and cut it out in cardboard before choosing everything else to go with it.
Thanks for looking!
Tracey x

Saturday, 21 September 2013

Wedding Post Box

Just before the wedding I found a Wedding Post Box in the Range whilst buying some craft items and thought I'd buy it for my Sister.  However once constructed I wasn't very happy with how it looked so I decided it needed a little bit of additional decoration. I started by adding silver star wrapping paper behind the card structure and then put the cage together. I added the ribbon it came with at the top but still wasn't happy. Next I made a 'Thank you' tag for my Sister to write a sentiment on and then made some bunting to hang across the front.  I have to say that the actual letter box wasn't the largest but it still worked well and best of all Ann was really pleased with it.
Thanks for looking!
Tracey x

Wednesday, 18 September 2013

Button Wrist Corsage

After suggesting making the button bouquet for my Sister's Wedding, I also suggested making a button wrist corsage for the 3 Bridesmaids (including myself) and my Sister.  Again my Sister loved the idea and it meant that she could keep the button bouquet theme even when she wasn't carrying her bouquet during the reception.

I sourced 4 pearl corsage bracelets online and then designed the corsage in a similar style to some of the bouquet stems using one of the large flower buttons as the main feature.  I also used felt, angel hair, crochet flowers, small buttons, pearls and wire.  Apart from the felt everything else featured in the bouquet.  I'm pleased to say that my Sister was also pleased with how these turned out.

Typically I forgot to get a photo taken of just the four of us together on the day showing our wrist corsages but here is a photo my Sister and one of my Nieces wearing theirs.
Thanks for looking!
Tracey x

Sunday, 15 September 2013

Button Bouquet

My Sister got married on Friday (13th September) and a few months ago I suggested making her a button bouquet after seeing a tutorial by Sarah Linda in Issue 38 the March/April Docrafts Creativity magazine. 

I used the guidance given to make the stems but instead of using lots of different size smaller button stems, Ann found some large flower buttons at the local market which she preferred. I have to admit that it still took quite a while to make (even with less stems) and I needed a heavier gauge wire due to the weight of each stem but I thoroughly enjoyed working on the project. I also had sore fingers quite a lot of the time and I found the final assembly step really difficult. I did a lot of research and couldn't get a round/dome bouquet shape to start with but after a few attempts I arrived at something I was happy with and I'm really pleased with the finished bouquet.
I used a couple of different buttons for the centre/top of the bouquet and added the names of the Bride and Groom using beads to make it personal to them.
Just before the big day one of my Sister's friends gave her an Angel charm which we attached to hang at the front. I'm glad to say that my Sister was thrilled with the finished bouquet and received numerous comments throughout the day.
Thanks for looking!
Tracey x

Saturday, 14 September 2013

Finnabair workshop 4: Prima Goes Inky - Part II

Sadly the Sunday afternoon session was our final workshop with Anna and it was all about creating beautiful pages for the journal we made in the morning workshop. Again, plenty of helpful guidance was on hand from Anna.
I managed to complete the first double page layout and again used an adopted ancestor for the project but I hope to swap the photo out when I get time to revisit my projects.
We started the second set of pages in class which uses a different style and managed to complete the background, but as they are not finished the photos will follow. Due to time constraints we were shown how to create the final style of layout ready for us to create our own pages at home and I'm particularly looking forward to trying this one myself so watch this space as the saying goes.

I had an absolutely fantastic weekend learning a different creative style, using new products and discovering some great techniques. I have a couple of items on my crafty shopping list but not many and I enjoyed every single moment. I also had the chance to meet up with a couple of crafty Twitter friends and the opportunity to make new crafty friends and actually remembered to take photos of them too.
It was great to see how everyone ended up with something different when using the same products and I am really inspired to get back in my craft room just to play.

If you get the chance to take a Finnabair workshop I'd say jump at it, you definitely won't regret it and I look forward to the next time too...

Thanks for looking!
Tracey x

Monday, 9 September 2013

An afternoon with Tim Holtz

So on Thursday 29th August I was in Coventry having spent a wonderful afternoon at my first and long awaited workshop with Tim Holtz.  The UK event was called 'Journeys of the Past' and really was just as brilliant as you'd imagine it to be!
We arrived to find the kit for the project already set out on the table (I didn't have to take a single thing with me).
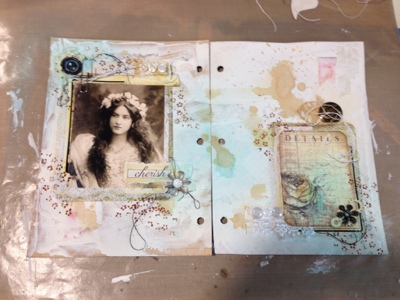
We got very inky using old and new products before adding numerous embellishments to each tag. It was so much fun. Tim is a great teacher and the workshop flowed along at a nice pace.
The finished tag book is just beautiful and I aim to add my photos from the afternoon to this once I get a chance to print them out.
The workshop itself was more than enough for me but then at the end we each received a few gifts and were allowed to keep the products we'd used for our projects, this was unexpected and very generous, needless to say I am so pleased with everything I came away with!
At the end of the event I managed to get my tag book signed and have photos taken with Tim, Mario, Dyan and Kaz.

I also had the opportunity to meet up with a Twitter friend, Emma.  Everyone was extremely friendly and I loved my experience. I really hope to have the opportunity to get inky at another workshop with Tim in the future.

Thank you all once again but especially Tim, Ranger and Personal Impressions, I had the most amazing afternoon!

Thanks for looking!
Tracey x

Sunday, 8 September 2013

Finnabair workshop 3: 'Prima Goes Inky - Part 1

The Sunday 1st September morning session was workshop 3 entitled 'Prima Goes Inky - Part 1' and  included plenty more yummy products in order to make canvas journal covers.
As always Anna provided the step by step 'how-to' guidance and there were plenty of Anna's projects on display to look at for inspiration if needed.
This workshop was also fun and involved lots of inking and drying and I love how my canvas journal covers turned out - the colours, the embellishments and the style.
And the next photo doesn't even begin to show how inky my hands were at the end of the session...
It really was a case of roll on part II...

Thanks for looking!
Tracey x